Thursday, February 03, 2005

Reaper's Galladon - 2114


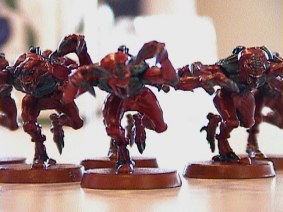
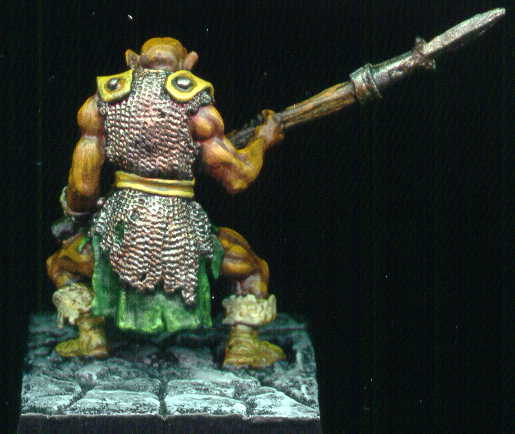
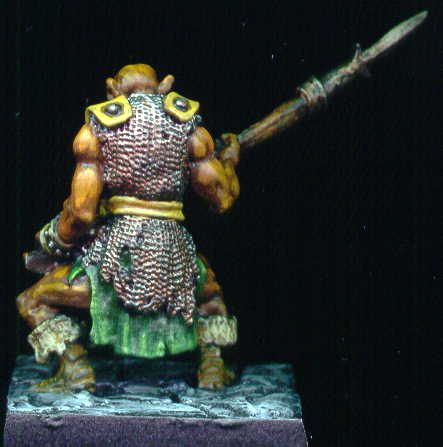
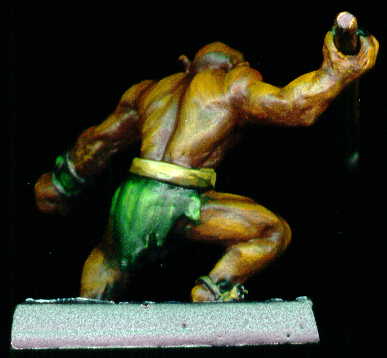
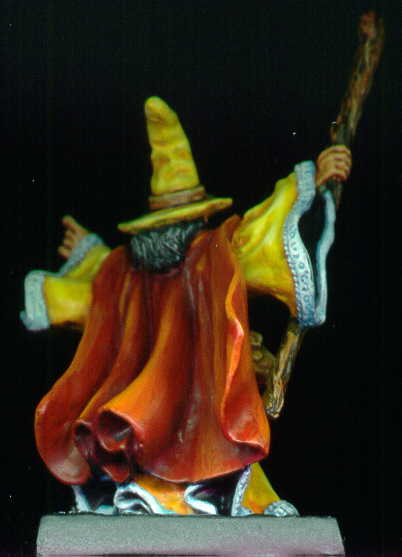
This is my longest running paintjob to date - about 2 years in the works. It was a testbed for many techniques and then shelved. I made a resolution to finish him in 2005. Finished in February 2005.

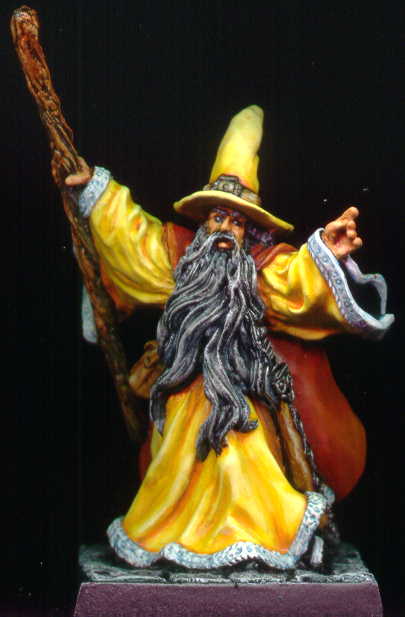
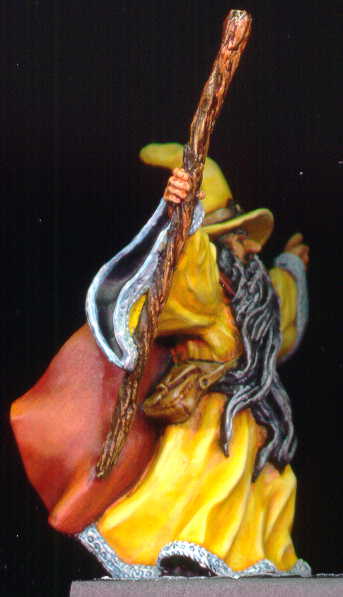
Painting Instructions for Galladin:
Step 01: Undercoat model with Chaos Black
Step 02: Use Fiery Orange on robe
Step 03: Use Golden Yellow on robe
Step 04: Use Sunburst Yellow on robe
Step 05: Use Bad Moon Yellow on robe as first highlights
Step 06: Add Skull White to Bad Moon Yellow on robe as second highlights
Step 07: Add more Skull White to the mix as third highlight on robe
Step 08: Use Scab Red on cloak
Step 09: Use Red Gore on cloak
Step 10: Use Blood Red on cloak
Step 11: Use Blazing Orange on cloak to highlight
Step 12: Use Fiery Orange on cloak to highlight
Step 13: Use Golden Yellow on cloak for final highlight
Step 14: Use Ice Blue on robe trim
Step 15: Drybrush Skull White on robe trim
Step 16: Drybrush heavier bits of Skull White on highlights of robe trim
Step 17: Use Scorched Brown on staff
Step 18: Use Snakebite Leather on staff
Step 19: Use Vomit Brown on staff
Step 20: Heavy drybrush of Bleached Bone on staff
Step 21: Use watered down wash of Chestnut Brown on staff
Step 22: Use Bubonic Brown on all leather - belt, pouch, belt on hat
Step 23: Use watered down Flesh Wash on all leather bits
Step 24: Use Bubonic Brown to highlight all leather bits
Step 25: Use watered down Bleached Bone on all leather bits as highlight
Step 26: Use Boltgun Metal on metal bits
Step 27: Use Skull White on beard
Step 28: Use Bronzed Flesh on face and hands
Step 29: Use watered down Flesh Wash on face and hands
Step 30: Use Bronzed Flesh on face and hands as highlight
Step 31: Use Elf Flesh on face and hands as final highlights

Sunday, January 30, 2005

Reaper's Men At Arms - 6055


Men at Arms - besides Orcs, every campaign needs to battle some evil warriors up to no good. So without further delay - here are 2 in the Reaper Men At Arms 4-pack (2 axe and 2 sword).

Painting Instructions for Men At Arms
Step 01: Undercoat model with Chaos Black
Step 02: Use Boltgun Metal on all metal
Step 03: Drybrush Codex Grey on base
Step 04: Drybrush Fortress Grey on base
Step 05: Drybrush Skull White on base

Saturday, January 15, 2005

Games-Workshop's Tyranid Genestealers


Tyranid Genestealers for Daniel's 40k game. These were a quick paint - we started out by spray painting the whole lot red. Then did a wash with Blood Red and a highlight drybrushing with Blazing Orange. Then painted all the skel structure with Chaos Black and drybrushed with Hawk Turquoise.

Reaper's Orcs - 6061


More Orcs! Everyone needs more orcs to brighten their day and I thought it would be a good idea to start the year out right by finishing off the orcs sitting on my shelf! Finished in January 2005.

Painting Instructions for Various Reaper Orcs
Step 01: Undercoat models with black primer
Step 02: Use Boltgun Metal on all metal bits
Step 03: Mix some Flesh Wash (2x), a bit of Red Ink a bit of Yellow Ink onto metal bits as a rust affect
Step 04: Lightly drybrush Boltgun Metal on all metal bits
Step 05: Use Dark Flesh on skin
Step 06: Use Vermin Brown to highlight skin
Step 07: Use Leprous Brown as final highlight on skin
Step 08: Use Scorched Brown on wood (including back of shields)
Step 09: Use Bestial Brown as drybrush on wood (line back of shields)
Step 10: Use Vomit Brown as drybrush on wood (highlight line back of shields)
Step 11: Use very light drybrush of Bleached Bone on wood
Step 12: Wash drybrush with Bestial Brown
Step 13: Use Snakebite Leather on leather (leave black lines)
Step 14: Use Bubonic Brown as heavy highlight on leather
Step 15: Use Scab Red on shield
Step 16: Highlight shield with Blood Red
Step 17: Use Boltgun Metal on metal bits of shield
Step 18: Use Chaos Black on sides of base and rocks
Step 19: Drybrush Codex Grey on rocks
Step 20: Drybrush Fortress Grey on rocks
Step 21: Drybrush Skull White on rocks

Saturday, January 08, 2005

Reaper's Orc Warrior of Kargir - 2259


Another orc sitting on the shelf. Finished in January 2005

Painting Instructions for Various Reaper Orcs
Step 01: Undercoat models with black primer
Step 02: Use Boltgun Metal on all metal bits
Step 03: Mix some Flesh Wash (2x), a bit of Red Ink a bit of Yellow Ink onto metal bits as a rust affect
Step 04: Lightly drybrush Boltgun Metal on all metal bits
Step 05: Use Dark Flesh on skin
Step 06: Use Vermin Brown to highlight skin
Step 07: Use Leprous Brown as final highlight on skin
Step 08: Use Scorched Brown on wood (including back of shields)
Step 09: Use Bestial Brown as drybrush on wood (line back of shields)
Step 10: Use Vomit Brown as drybrush on wood (highlight line back of shields)
Step 11: Use very light drybrush of Bleached Bone on wood
Step 12: Wash drybrush with Bestial Brown
Step 13: Use Snakebite Leather on leather (leave black lines)
Step 14: Use Bubonic Brown as heavy highlight on leather
Step 15: Use Scab Red on shield
Step 16: Highlight shield with Blood Red
Step 17: Use Boltgun Metal on metal bits of shield
Step 18: Use Chaos Black on sides of base and rocks
Step 19: Drybrush Codex Grey on rocks
Step 20: Drybrush Fortress Grey on rocks
Step 21: Drybrush Skull White on rocks