Friday, November 29, 2013

Reaper's Eli Quicknight - 2425


Welcome to Black Friday!  I did my annual mecca to Best Buy in order to oogle at various electronic devices and to get a feel for the latest trends - I'm really impressed with two - the all-in-one pc is back, but this time it really works as it's a flat touch-screen with wireless keyboard and mouse (I'm not into the metro design or whatever Microsoft is calling it these days, but I think it works well on these new devices) - the second trend that impressed me was the boom to wireless speakers with wifi control (fifteen years ago I had a set of Bose speakers ceiling mounted professionally in the main tv room with wires running to the central controls - an expense no longer necessary).  There's a third trend and I think next year it will really take off, everything attached to wifi with the ability to control all devices via the web or your smartphone.  After a bit of browsing, I picked up a couple cheap movies and then hurried home to paint.

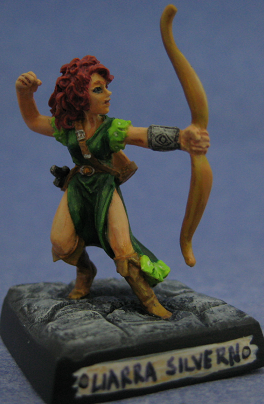
I thought about tackling my prepped Kickstarter goblins, but I decided as I had the afternoon/evening to myself that I'd crank out a complete miniature - so back to the good old metal and the figure Eli Quicknight from Reaper Miniatures.

Painting instructions for Eli Quicknight:

Step 01: Undercoat model with black primer
Step 02: Use Dark Angels Green on shirt and pants
Step 03: Use mix of Chaos Black and Scab Red on cloak
Step 04: Use Bronzed Flesh on face and hands
Step 05: Use Sepia ink watered down on face and hands
Step 06: Highlight face and hands with Bronzed Flesh
Step 07: Use Scorched Brown on leather armor and boots
Step 08: Use Leprous Brown on leather belt straps and rope
Step 09: Use Sepia ink watered down on leather belt straps
Step 10: Further highlight face and hands with Elf Flesh
Step 11: Final highlight of face and hands with Pallid Flesh
Step 12: Use Snot Green as initial highlights on shirt and pants
Step 13: Use Scorpion Green as final highlights on shirt and pants
Step 14: Use Bestial Brown as highlights on leather armor and boots
Step 15: Use Snakebite Leather as final highlights on leather armor and boots
Step 16: Drybrush Bleached Bone on rope
Step 17: Use Enchanted Blue on liquid vial
Step 18: Highlight liquid vial with Lightning Blue
Step 19: Final highlights on liquid vial with Ice Blue
Step 20: Use Scab Red on cloak
Step 21: Use Red Gore on cloak for highlights
Step 22: Use Blood Red on cloak for final highlights
Step 23: Use Bronze on sword handles and cloak pin
Step 24: Use Gunmetal on swords
Step 25: Drybrush Codex Grey on base
Step 26: Drybrush Fortress Grey on base
Step 27: Drybrush Skull White on base
Step 28: Clean up sides of base with Chaos Black

Reaper's Skeletal Archer - 77018


Nothing overly exciting about these skeletons - more cannon fodder for first level characters.  The Kickstarter included two while a package of 77018 will include three.  I didn't invest a lot of time on these - quick sets of drybrushes, a wash, and set into one inch bases from Fortress Figures.

Happy Thanksgiving!

Kickstarter painted total - I was at 26 at last count, +1 for the Marsh Troll and +4 skeletals = 31

There's now actually a little bit of space on my desk!

Reaper's Skeletal Swordsman - 77017


Nothing overly exciting about these skeletons - more cannon fodder for first level characters.  The Kickstarter included two while a package of 77017 will include three.  I didn't invest a lot of time on these - quick sets of drybrushes, a wash, and set into one inch bases from Fortress Figures.
Happy Thanksgiving!

Tuesday, November 26, 2013

Goblins Webcomic...


This weekend I prepped up a dozen goblins from the first Reaper Kickstarter and I jumped on the net for a bit of inspiration.  The Reaper goblins are quite a bit taller than the third edition D&D miniatures put out by Wizards and they have this great elongated face that reminds me of the Green Goblin from the Spiderman comic books and shows.  I did find a fantastic paintjob by a guy called Crowmire located on the Warseer website (see post 11).  I'm going to stick with a more traditional D&D color of a dark red / burnt orange / pale yellow - so look forward to that in a later post.

However... the point of this posting, in my search for goblin color schemes I came across a webcomic called Goblins located at www.goblinscomic.org which I must say is an excellent read.  If you haven't come across this before then start at the beginning of the Goblins story.  I wasn't much into comic books as a kid, but this webcomic puts me back in early high school around 1983/84 - there was a series of what was unique 8-1/2x11 full color comic books called Elfquest (boy would I still like to have my original copies of those books - along with my blue box D&D set, my first edition AD&D hardcovers, and my box of little metal/lead men and monsters).

Saturday, November 23, 2013

Shaqtila


Reaper rarely names their monsters - so I left this one on the painting table when I was finished last week and had to come up with a name - I didn't want to put marsh troll on the base.

A lot of early D&D was a bit of tongue in cheek humor and with that in mind I finally decided to name my Reaper Marsh Troll (77152)... SHAQTILA - my unique take on Shaqzilla as this monster looks a bit like a blend between Shaq and Godzilla!


Tuesday, November 19, 2013

Reaper's Marsh Troll - 77152


Staying with the big stuff but moving back to the pvc plastic - here is the Marsh Troll from the original Reaper Miniature's Kickstarter.  I think this one is unique in that there is not a metal master from which this mini was derived that I can find - I do believe that this sculpt originated as part of the Kickstarter and has only been produced in the new pvc plastic.

I went to town on this Friday night and then finished off some drybrushing on the base after the Monday night football game.  Again, my goal on these products is to produce a fast, efficient, game worthy paintjob and in that light I do no prep work to the model other than to put it on a base.  In this case it's the 2" base from Games Workshop (technically I think it's a 50mm monster base).  That covers the correct basing for a D&D 3.5 / Pathfinder role-playing game.

For the most part the camera shots came out pretty well - I was able to shoot it up using digital macro and the club gets a little blurry in the picks as it has a greater depth of field than the macro focus.

Painting Instructions for Marsh Troll:

A quick note on basecoating - I don't think I've mentioned in my previous posts - but when I used the spray primer there was a bit of tackiness that never went away on the first couple of bones figures that I painted.  While doing some research I came across some articles on the Reaper forums how others experienced the same thing.  The paint characteristics that work really well for metal don't work the same for this pvc material - what happens is that the primer actually eats into the pvc and doesn't completely dry - that's the tackiness.  It's best to use a straight black undercoat from your acrylic paint sets - just slightly watered down (not too much or it won't stick).  I've used that to great effect on my later models using a giant fat brush that I stole from my kids art set - works great.

In this case I actually did what Reaper recommends or at least states - that you can paint straight on the figure - while I found this true that you can, I really had to give it two coats to get the initial coverage that I wanted.  I used a double-coating of Reaper's Clouded Sea for the skin, Vallejo's Game Color Heavy Red for the plating, and Vallejo's version of Scorched Brown for the leather, fur, and cloth bits.

The paintjob is a combination of layering, drybrushing, and blending techniques...

I continued adding Skull White to the Clouded Sea and added a couple of layers to the skin until I ended up with the highlighting that I wanted.

The belly was carefully blended using Clouded Sea and Rotting Flesh - drawing the Clouded Sea color into the Rotting Flesh so that the highlight of the sagging belly was pure Rotting Flesh.

Next I used a combination of drybrushing on the plates which stick up starting with Blazing Orange, Golden Yellow, and then Skull White.

On the scales across the back, arms, and legs I used a drybrushing of Fiery Orange to which I then proceeded to add Skull White layer after layer - this gave me a cool orangey/pink/white highlight effect.

The fur was drybrushed Vermin Brown and Leprous Brown.

The leather was painted up with Snakebite Leather and Bubonic Brown highlights.

The club was Bestial Brown with highlights of Bubonic Brown and washed with Sepia ink.

The club spikes and finger/toe nails were done up with Bubonic Brown, Bleached Bone, then washed with Sepia ink, then highlighted with Bleached Bone and then a mix with Skull White.

The cloth was a layer of Dark Angels Green and then Snot Green for highlights followed with a final highlight of Scorpion Green.

The front loincloth was Bad Moon Yellow followed by a heavy wash of Sepia ink.

The final touch to the model was to drybrush the base - Codex Grey, Fortress Grey, and then a touch of Skull White.

Monday, November 11, 2013

Reaper's Skeletal Dragon - 2705


Back to the metal!  While the plastics are a great choice for inexpensive miniatures, there's just nothing like pulling out the heavy metal and rocking the gaming board.  This is Reaper Miniatures' Skeletal Dragon sculpted by Bob Olley.  A fantastic sculpt and a dragon that I just can't wait to animate on a group of "up to no good" heroes.

Painting instructions for Skeletal Dragon (Draco Osseus):

Step 01: Undercoat model with black primer
Step 02: Use Vomit Brown on all the bones
Step 03: Wash with Sepia ink (from Vallejo)
Step 04: Drybrush bones with Vomit Brown
Step 05: Drybrush bones with Bleached Bone
Step 06: Drybrush bones with Skull White hightlights
Step 07: Use Desert Yellow on wings
Step 08: Wash wings with watered down Graveyard Earth
Step 09: Drybrush wings with Rotting Flesh
Step 10: Drybrush base with Codex Grey
Step 11: Drybrush base with Fortress Grey
Step 12: Drybrush base with Skull White highlights

Tuesday, November 05, 2013

Larry Leadhead

Larry Leadhead was one of my favorite running series of gaming cartoons by Doug Hamm & Eric Hotz.  Several years there was a link on this site as the top most blog post (I changed the date to Dec. 31st each year) to their larryleadhead.org website which had an on-line cartoon that the cartoonists would automatically shuffle.  Then for a long time it was the same cartoon and several months ago the website seized to exist and nothing would post on this blogpost.  I don't know what happened but I suppose all good things must come to an end.

So, in memory of Larry Leahead, I've taken a picture of two strips which I've had taped appropriately to my "to be painted" shelf.

The first strip is actually dated the later of the two (September 3rd, 2010) and depicts Larry purchasing a castle, then the castle guard, and then an army before announcing that his workbench should be cleared right after the funeral.

The second printout is a very early strip (January 30th, 2001) which shows what happens if you actually paint all your figures - and between Reaper's Kickstarter and Kickstarter II, like the cartoon, I too should get to 147 years old.


Sunday, November 03, 2013

Reaper Re-Basing Project


Over the weekend I did a quick re-basing and touch-up project - the above three miniatures were originally painted back in November of 2000 for the Jason Moses Chick Challenge.  They've each gone through a number of Dungeons & Dragons campaigns and on their original Reaper "cauliflower" base were prone to tipping over and getting badly nicked up (I didn't start basing on Reaper's one inch base until April 2003 with Kang which was done for a D&D 3.0 campaign I was playing as a half-orc rogue).

I touched up the chips and based them on one inch bases.  Additionally, those early paints weren't sprayed with any type of protection.  Since then, all gaming models get a hit of Rust-Oleum Painter's Touch matte clear (found at Home Depot) which puts a nice protective layer over the model.  When that dries I hit it with a coat of GW's matte varnish as that provides a much better flat/matte finish (but doesn't protect as well as the Painter's Touch).

Between the proper basing and the double-layer of varnish they should be ready to go for many more campaigns!

Original posts...
Brianna of the Blade - Reaper 2267
Liarra Silverrain - Reaper 2155
Shaedra, Heroine - Reaper 2393

Saturday, November 02, 2013

Reaper's Rats - 77016


Well rats!  Just like the kobolds - I'll apologize for the pictures up front - I took about two dozen and just haven't figured out how to get the best lighting and macro pictures for a group this size.  Above are the best 2 picks of the bunch and hopefully between the two you get the idea.

Updated picture 11/08/2013 - much clearer...


The Reaper Kickstarter came with a dozen rats - four each of three different poses - I based them up each a bit different to hopefully look like there's a bit more variety.  You can currently order a set of bones for $3.49 and you'll get six.  The pre-painted Legendary Encounters comes in a pack of three - so six will run you $11.98.  The original metals are in the Legends line and there's actually a fourth sculpt in the package (with the rat's head down on the ground) - the price of the package of four is $6.99 - or about $10.50 if extrapolating out to six minis for comparison.

I also based these and the kobolds on the smaller Games Workshop Warhammer bases - they're about the right size for this sort of model - I thought about putting them on a one inch base and the miniature gets lost in the basing.

Talking about bases... a shout out to all the Creative Memories scrapbookers out there - two years ago I started putting names on the miniature base.  On my first miniatures the names were put on painstakingly with paint and a really tiny brush - then, with all those kobolds last month, I stole my wife's Creative Memories fine tip pen and that worked well (much, much easier than paint) - last week I happened to be at a craft store and thought it would be nice to give my wife back her pen; so I picked up a Marvy Le Pen fine tip and the ink bled when spraying the matte varnish - guess my wife isn't getting her Creative Memories pen back (sorry honey).

Painting these was a straight forward endeavor - grey, brown, white - wash - drybrush - done.  12 rats to devour a first level party of adventurers - I can see it now - you hear scratching and squeaking coming from a crack in the wall - roll for intiative...

round 1 - three rats
round 2 - three rats (expected)
round 3 - three more rats (unexpected)
round 4 - just in case the party didn't get enough - 3 more rats

Should be able to get at least one dead party member out of that encounter.  Who needs encounter tables - every good DM should take the opportunity to use every miniature in the box :-)

2 skels + 12 kobolds + 12 rats = 26!